Table of Contents:
How to Create Pinterest Pins Your Followers Will Love

Table of Contents:
Are you looking at all of the digital marketing tools available? Are you trying to figure out how to connect with your ideal audience?
You might be wondering how to leverage all of the tools at your disposal; however, you might also be wondering which tools work best for you. One example is Pinterest.
Research has shown that when people use Pinterest, they are ready to make a purchase. When you get started using Pinterest Pins, it might seem easy to create them, pin them, and go crazy!Pinning everything that comes to mind will not generate the traffic you need to grow your business. Instead, you might simply end up drowning out what truly matters about your brand.
Instead, you should focus on optimizing your Pins, making sure that every Pin generates maximum traffic, and that you are connecting with your ideal audience.
How can you optimize your Pinterest Pins? Keep reading because I’m sharing some of my best tips!
How To Create Eye-Catching Pinterest Pins
When it comes to making a Pin on Pinterest, there are two essential parts to note.
The first involves how to create Pinterest Pins from scratch.
The second covers how to make pins on Pinterest stand out from the crowd, so you are driving traffic to your website and sales pages. That will help you maximize the return on your digital marketing investment.There are a few ways that you can quickly create Pins on Pinterest. These include Pinterest, Snappa, and Canva.
Creating Pins on Pinterest
The first step is to use the free Pinterest Pin maker using the Pinterest application. Even though this is the easiest way to make Pinterest Pins, it is relatively limited.
If you are just getting started with Pinterest, then this is a great option. To use the Pinterest Editor to make Pins, you should:
- Select the product photos that you would like to use.
- Crop every photo into the ideal shape of 2:3.
- Add your logo to the Pin (the bottom center is the ideal location).
- Add a text overlay if you would like, such as words that explain the product or service promoted by the Pin.
After this, you can save your Pins and publish them when you are ready. It is essential to choose a schedule for your Pinterest Pins as well.
Creating Pinterest Pins in Canva
Another option for making gorgeous Pinterest Pins is to use Canva. Canva is an intuitive graphic design website that uses a drag-and-drop editor, making it easy for almost anyone to create stunning graphics with a few clicks.
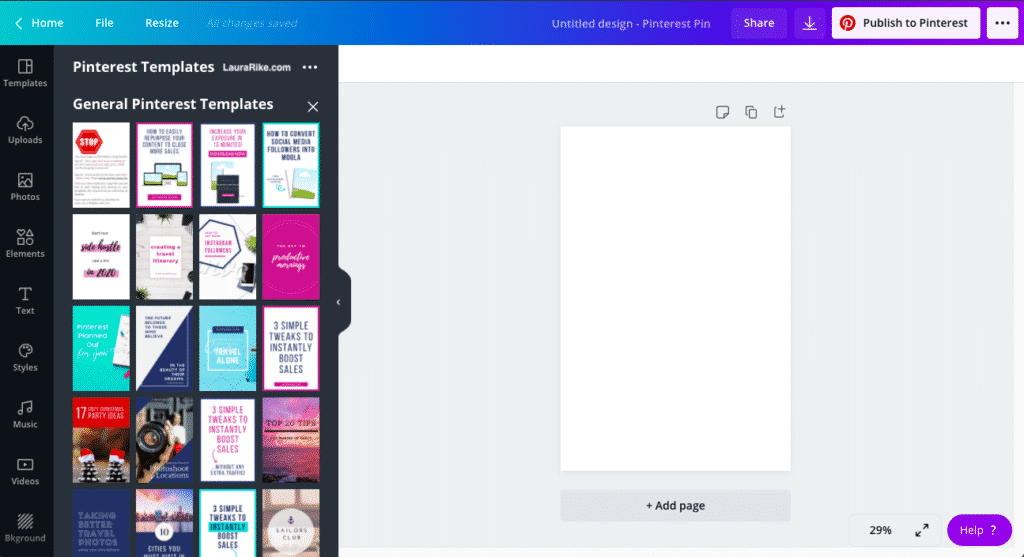
To make Pinterest Pins on Canva, you should:
- Register and create an account on Canva.
- Choose the design that you would like to create.
- Drag and drop the elements you need to design your Pinterest Pins (there are also helpful templates available to help you get started if you would like).
- Save your pin.
Then, download the Pin and upload it to your Pinterest account or schedule it to be published later. It is helpful to have a few versions of the same Pin. That way, you can see which one your audience responds to the best.
Designing Pinterest Pins That Stand Out Online
With multiple options to make Pinterest Pins, you might be wondering how to drive traffic using these pins.

To drive traffic, you need to make awesome Pins using:
- Photos: Try to use your photos to communicate to your visitor's how your brand is going to fit into their lives
- Colors: Warm colors tend to work better than cool colors
- Text Overlays: Choose a simple font with a short message that tells the reader what to do next
- Designs: The 2:3 proportion tends to get the best engagement on Pinterest
These tips will help you create standout Pins that will drive traffic to your website.
Choosing the Right Color Combinations
When you are creating Pins, think about the colors and fonts that you will be using. While warm colors are usually more attractive to your audience, don't be afraid to accent your primary colors as well.One easy solution is to pick two colors next to each other on the color wheel, such as blue and pink. Choose one primary and one accent color to create a beautiful color combination your audience will love without overwhelming them.
Choosing the Font for Your Pins
You also need to think about the best fonts for your Pins. Some of the most popular fonts include:
- Serif
- Sans serif
- Display fonts
These fonts are exceptional on Pinterest because they stand out from the Pin and are legible. Even though you might be able to read your Pin clearly on the screen, your potential customers might not be able to make out some of the smaller fonts. You can also bold the fonts, using a thicker stroke to make them easier to read.Don't be afraid to mix and match your fonts but remember that less is more. Try to avoid exceeding two or three fonts. Keep the text short, sweet, and to the point.
Select a High-Quality Image
Even though this might seem obvious, you need to make sure that you select a high-quality image for your Pinterest Pins. Try to target images that are about 736 pixels wide without any pixelation. If the images are pixelated, this is going to turn off users quickly.Try to focus on tall images because they appear on the screen for an extended amount of time as people scroll by. Even though longer images are better, do not make them so long that it impacts the image’s quality.When in doubt, stick to a high-resolution image. You don’t need to create an image on every Pin, but do not use cheesy stock photos that will turn people off quickly, either.
Select a Relevant Image
Besides choosing a high-quality image, you want to make sure that it is relevant to the Pin itself. Even though this sounds obvious, many people select an image with nothing to do with the Pin itself.Whether someone is trying to drum up some free traffic or simply forget what the image is as they decide the rest of the Pin, do not pull a bait and switch on the reader.The image needs to reflect the contents of the link. If you have issues because the concept you are trying to communicate is abstract, then the text can do a little bit of the work for you. Placing a title on the Pin can help users figure out the intentions of an abstract Pin.
Minimize the Text on the Pin
There is a saying that a picture is worth a thousand words, and this is certainly true when it comes to Pinterest Pins.You want the image to do most of the legwork when it comes to Pinterest Pins. Try to limit your text to only a few words. The text should communicate a desired action to the viewer, pushing them to do something, like trying a recipe or downloading something free on your website.It’s a good idea to test your text and make sure that it is visible on both desktops and mobile devices. If the text is hard to read on mobile screens, then this is a sign that there might be too many words present.Applying these suggestions will help maximize your engagement and traffic. They will also help you drive up your conversion rates and boost your sales.
Brand Your Pins Appropriately
When designing your Pinterest Pins, you also need to make sure that your brand is front and center. You should include your company’s colors, logo, or slogan.Your logo should reflect the nature of your business, allowing everyone who views your Pins to quickly identify what your company is all about. Keep your logo simple and ensure it is scalable across all of your pins. That way, your logo will always show up as a high-quality image that makes a strong, powerful, personal connection with your potential customers.
Include a Call To Action
Visitors might be looking at your Pin and think it’s great; however, they might not know what you want them to do next. So make sure that you include a call-to-action with each Pin.Even if the link is already in the image itself, add it to the Pin’s description too. This simple addition can dramatically increase your traffic, leading to more conversions.A few examples of strong calls to actions include:
- Click here to learn more!
- Check out more about our product or service here!
- Visit us here to take advantage of this opportunity!
Even a simple call-to-action has a chance to increase your traffic dramatically.
How To Schedule Your Pinterest Pins: MeetEdgar Is an Approved Pinterest Scheduling Platform
It is also essential for you to schedule your Pinterest Pins. While you can certainly do this using the Pinterest app, MeetEdgar is now an approved Pinterest Pin scheduling platform!

To schedule pins on Pinterest through MeetEdgar, you should:
- Visit Pinterest.com and click the "sign up" button.
- Create a Pinterest account and accept the terms and conditions.
- Go to MeetEdgar and select the "accounts" option to connect your Pinterest account with MeetEdgar.
- In the Schedule section of your MeetEdgar account, set up your Pinterest pinning schedule.
- You can create separate scheduling categories for each of your Pinterest boards, so you are scheduling consistently.
- You can even customize all of your pins individually from Meet Edgar, allowing you to tailor your Pinterest Pins to meet your unique audience’s needs!
Best Practices and Tips To Optimize Your Pinterest Pins After Your Have that Gorgeous Design
Once you have a drool-worthy Pinterest Pin, you are ready to optimize them.There are a handful of tips that you should follow if you want to get as much out of every Pinterest Pin as possible.
1. Optimize Your Pinterest Boards
The first step is to ensure that your Pinterest profile is complete and that your Pinterest boards are optimized.Make sure that your boards are organized. Try to emphasize the titles of each Pin as well as the images on the individual boards.Think like a Pinterest user when you are trying to name your board. How is someone who is looking for your products or services likely to search for a Pinterest board?
Even though a funny or clever name is nice, it’s more important to optimize the titles of your Pinterest boards in a way that will allow other users to discover them easily using the search features. The board names are searchable, so target the right keywords when you are naming your Pinterest boards.
2. Don’t Neglect the Description
The vast majority of Pinterest users do not spend enough time on the description of each Pin. As a result, this diminishes the chances of having the Pin saved.

Pinterest favors Pins that have thoughtful, specific descriptions. The description aims to help people find the image they are looking for when they perform a search. Add details that describe your image. Create a natural flow to your text to increase the Pin’s ability to be uncovered and saved by others.
3. Include UTMs in Your Pins
Even though Pinterest will not prompt you to add a UTM code to the end of each link, you should make sure that you do this.UTM codes (aka tracking tags) will let you figure out where you get your traffic from a search engine or your Pinterest Pins.You can also track the designs of your individual Pinterest Pins. Using UTMs, you can A/B test each of your Pins, figuring out what designs work with your audience and which do not.You can then improve your current and future pins to get maximum engagement and traffic.
4. SEO-Specific Titles
When you are developing titles for your Pinterest Pins, remember that they do not have to be the same as your image. Pick strong keywords that your target market will use when looking for the products and services you offer.Don't hesitate to do some industry-research and see if there are long-tail keywords that you can target using your Pinterest Pins. The better your keywords, the more chances you have of being found using the search features on Pinterest.
5. Pin Consistently
If you want to keep the attention of your audience, then you need to pin regularly.Pinterest is designed for the recirculation of evergreen content. You need to spend time curating content that you can frequently share with your audience.You should not be spamming your account with new Pins, but you need to develop a regular schedule that you can follow, posting content regularly.You’ll get your audience into a rhythm regarding what to expect and when to expect it, which can go a long way toward generating more traffic for your business.
6. Get Your Website Verified
On Pinterest, a verified website appears to rank higher in search results than pins from websites that are not verified. You will gain access to Pinterest Analytics, which will help you understand how pins are performing, which Pins are most popular, and how your audience behaves.
Your profile picture will show up next to your Pins, and everyone will be able to see that your website is verified. It’s kind of a big deal!
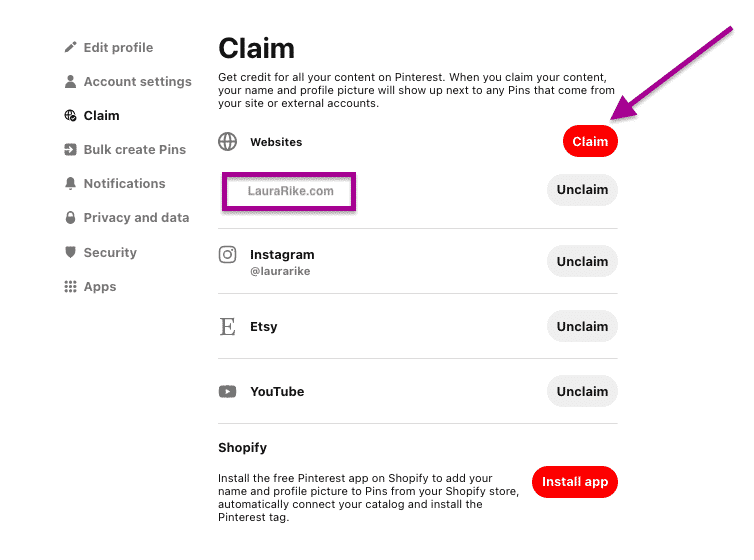
To verify your website:
- Upload a meta tag on your site or upload an HTML file.
- From your Pinterest profile, click on the edit button.
- Navigate to "settings" and "claim."
- Click on the "confirm website" button and copy the appropriate code into the box.
- Click on the "Finish" button to complete the process.
7. Use Rich Pins
When it comes to how to make Pinterest Pins, make sure that you use rich Pins. Rich Pins are an enhanced version of regular pins, and they provide more information to the user.There are six different ways to use rich Pins:
- App
- Movie
- Article
- Product
- Place
- Recipe
Use these Pins to provide information regarding the price of a product, share a recipe with users, or give a helpful article that your audience will love.
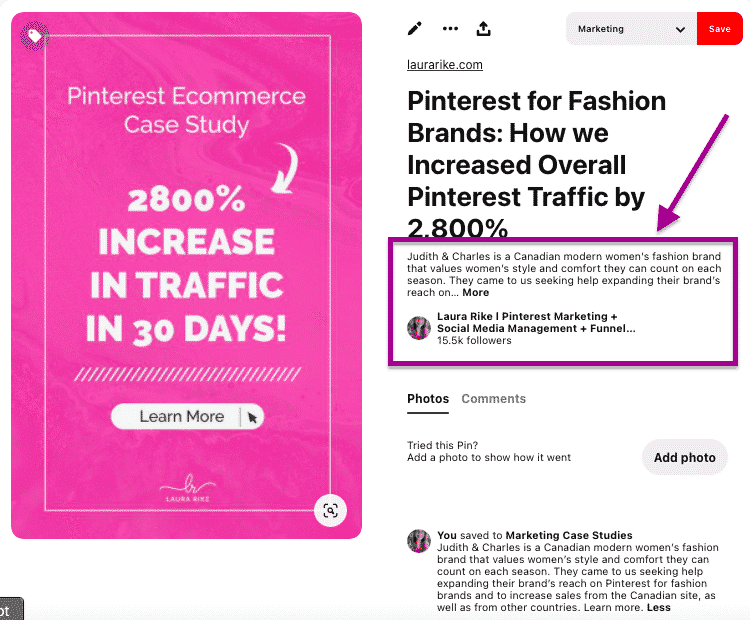
However you use them, rich Pins usually do better than regular Pins in search rankings, so be sure to use them if they apply to your products and services.
8. Search Engine Optimization for Your Pin
Ensure you are using SEO-friendly terms when you are trying to describe the content behind your Pin, getting it to rank highly in search engines.You get 500 characters for your Pinterest description. Reserve the first 50 characters for what you want to show up on Pinterest users’ newsfeeds.Limiting descriptions to 100 characters total is not necessarily a bad thing. Brief descriptions are more likely to get read, including the call-to-action that will get people to click on your Pin or the link.Using SEO-friendly terms, you can improve the search engine ranking of your Pins, driving up your traffic.
Leverage the Power of Pinterest Pins
Pinterest Pins can undoubtedly help you grow your business! When you try to figure out how to create Pinterest Pins, you want to shoot for eye-catching, drool-worthy designs, including Pinterest Pin optimization, A/B testing, UTMs, and high-quality images.When you put these tips to work for you, your traffic will go through the roof! You will generate more leads, boost your conversion rates, and expand the authority of your brand!

Subscribe to our newsletter
Are you ready to automate your socials?
Say goodbye to manual scheduling and hello to effortless automation.
