Table of Contents:
How to Add Multiple Photos to Your Instagram Story (Step-by-Step Guide)

Table of Contents:
Instagram Stories disappear in 24 hours, which means you've got a narrow window to make an impression. Adding multiple photos to your Instagram Story is a simple way to create more engaging, dynamic content.
It perfect for launching a new product, showcasing an event or sharing a weekend recap, for example. One photo is sometimes not enough.
In this comprehensive guide, we will explore the four most effective methods to post multiple pictures on Instagram, along with expert SEO tips to boost your visibility in 2026.
Method 1: Use Instagram’s Layout Feature
Instagram has a built-in Layout tool inside the Story camera that lets you split your screen into a grid and fill each section with a different photo. It's the quickest native option for showing multiple images at once and you don't need any extrathird-party apps.
Here's how to use it:
1. Open Instagram and swipe right to access the Story camera.
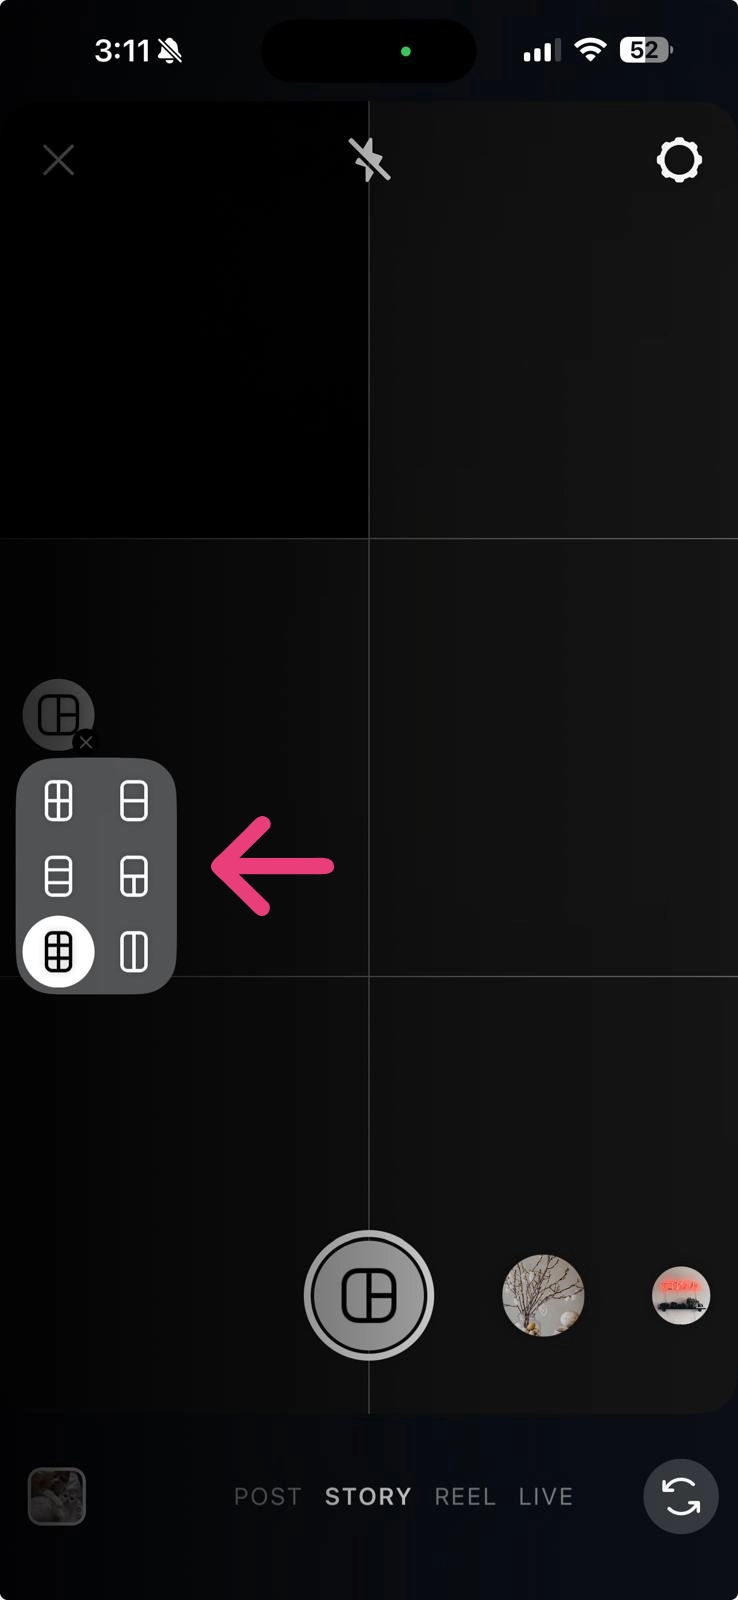
2. In the left-hand toolbar, tap the Layout icon (it looks like a grid of squares).
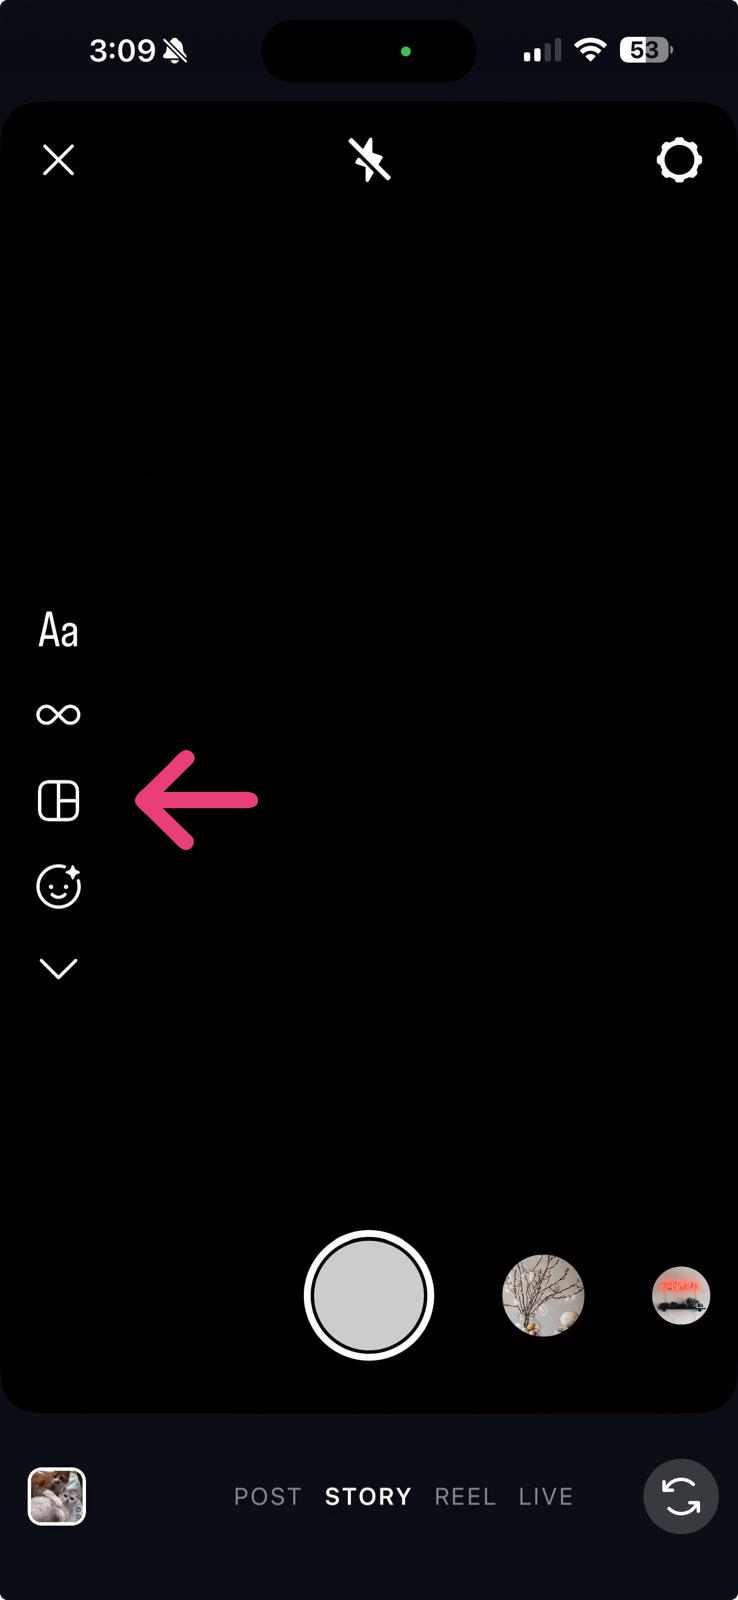
3. Choose your preferred grid layout — you have 6 options to choose from which includes 2, 3, 4, or 6 panels in different arrangements.
4. Tap each panel to either take a new photo with your camera or select an existing one from your gallery. You need to select one by one. Adjust positioning if needed.

5. Once all panels are filled, tap the checkmark and you can customize your Story with text, stickers, or music before sharing.
If you change your mind about a selected photo, simply tap on its panel to delete it and choose another one.
Method 2: Use Instagram Stickers
This is one of the most underused features in Instagram Stories. The sticker tray has two options that let you add extra photos on top of whatever background you're already working with.
Instagram offers two powerful sticker options to add multiple photos: the standard Photo Sticker and the viral Frames (Shake to Reveal) sticker.
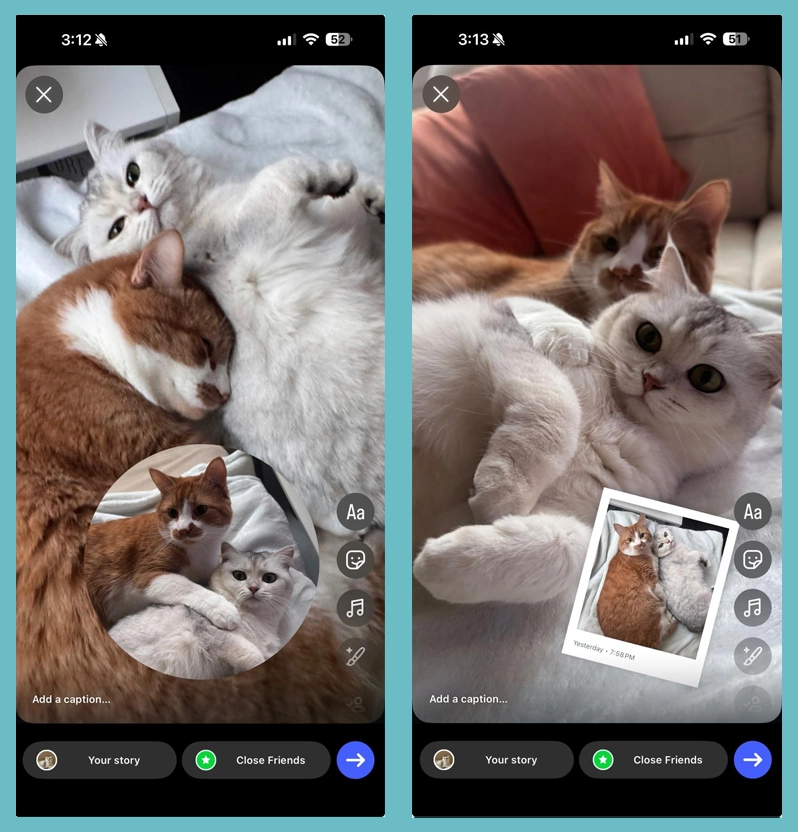
- Photo Sticker: Adds a photo from your camera roll directly onto your Story as a movable, resizable sticker. You can place it anywhere, scale it, and even add multiple photo stickers on the same slide for an overlapping collage effect.
- Frame Sticker (Shake to Reveal): Adds a polaroid-style frame with a photo hidden inside. When viewers shake their phone, the photo is revealed — great for product reveals, surprises, or driving interaction with your audience.
How to use Story stickers to add photos:
1. Open your Story editor with a photo or background already set.
2. Tap the sticker icon (the square smiley face) at the top of the screen.
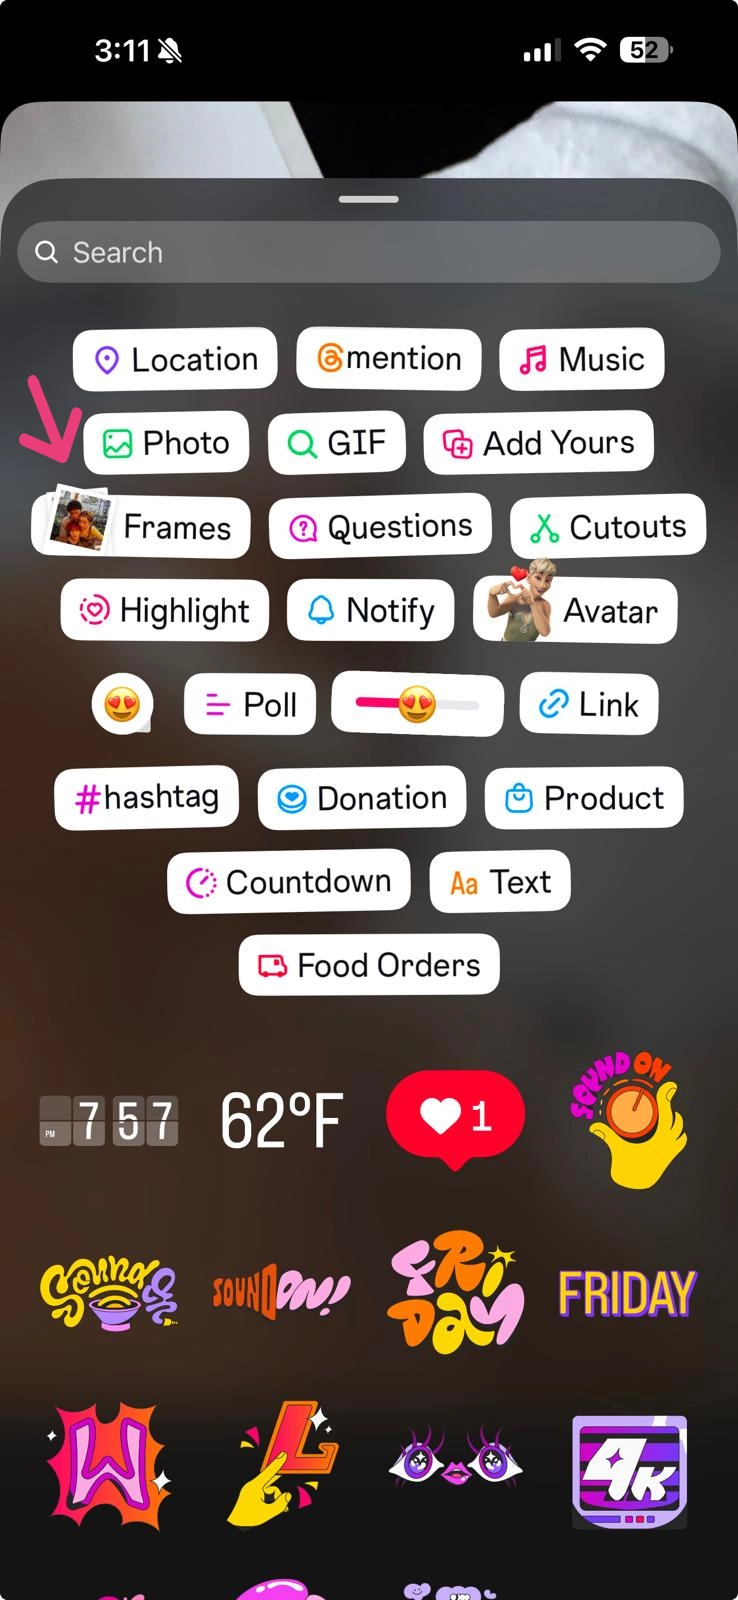
3. Search for "Photo" to find the Photo sticker, or "Frame" for the Shake to Reveal option.
4. Select a photo from your gallery.
If you are adding a "photo", tap the added photo to change its shape (circle, heart, star, etc.). You can add as many as you like!

If you are adding a "frame", pinch to resize, add a Add a "caption" or hint and drag it wherever you want on the screen.

5. After adding or photo or frame stickers, you can keep editing your stories and even add more stickers. Then, just share to your Story!
Method 3: Select Multiple Photos
If you want each photo to appear as its own separate Story slide — one after the other — the Select Multiple feature is the fastest way to do it. Instagram will post them as a sequence, so viewers tap through each photo individually.
1. Open the Story camera and swipe up (or tap the gallery icon in the bottom-left corner) to access your photo library.
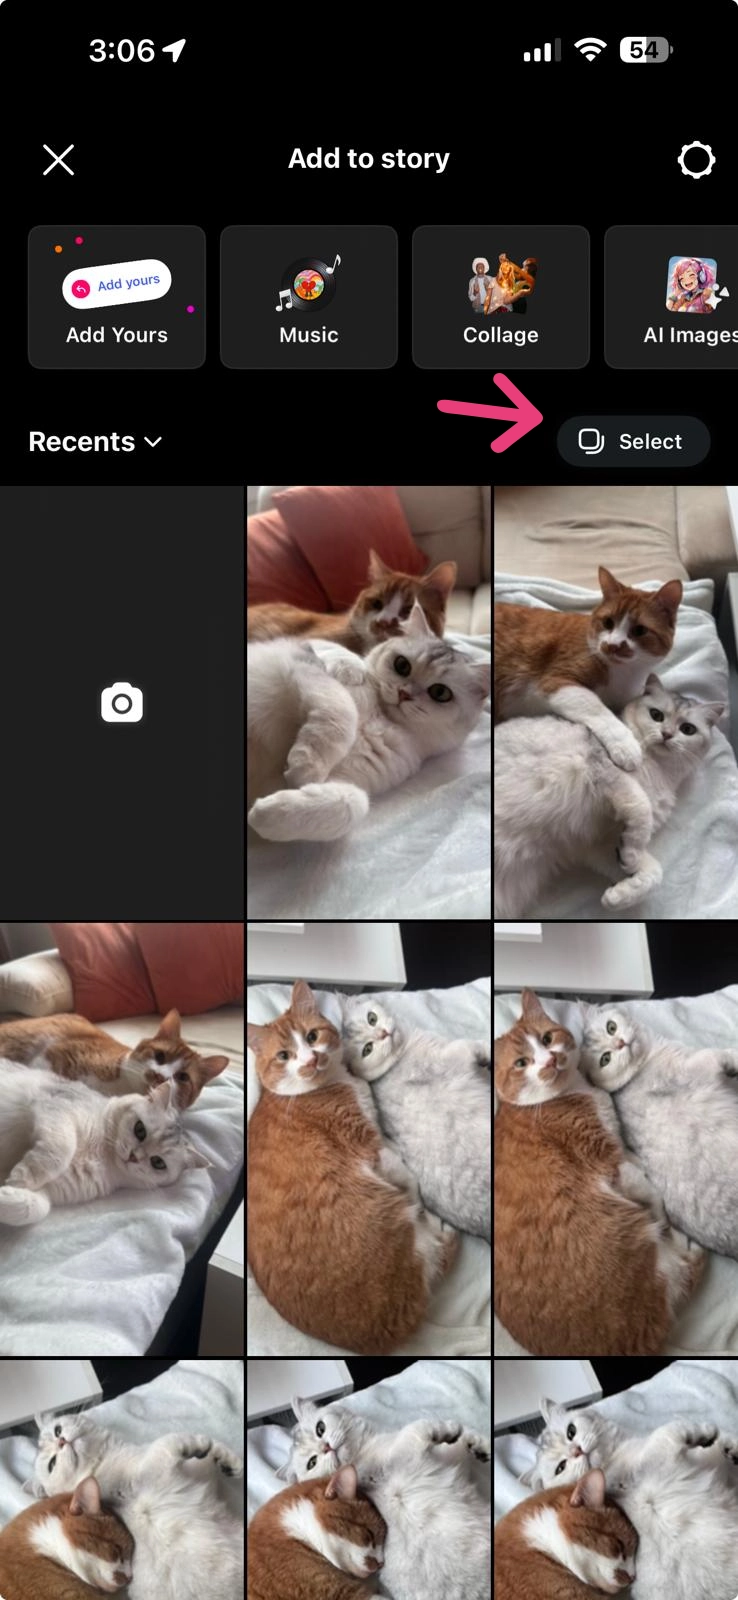
2. Tap the Select Multiple icon (two overlapping squares) that appears near the top of the gallery.
3. Tap each photo you want to include — you can select up to 10 photos at once. They'll appear numbered in the order you select them.
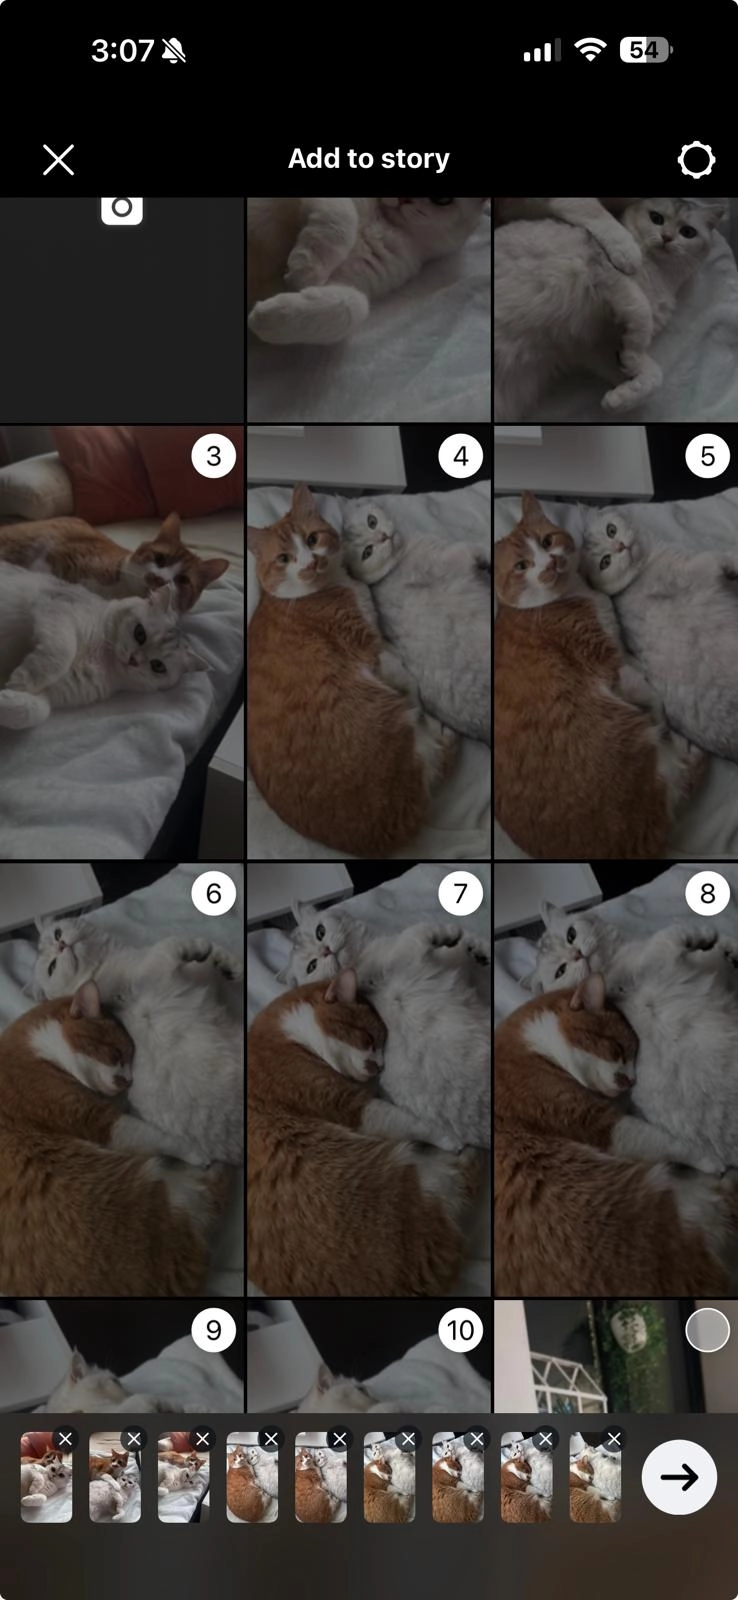
4. Tap Next (arrow) and you'll be taken to a preview where you can edit each slide individually — add text, stickers, or filters to each one before posting.
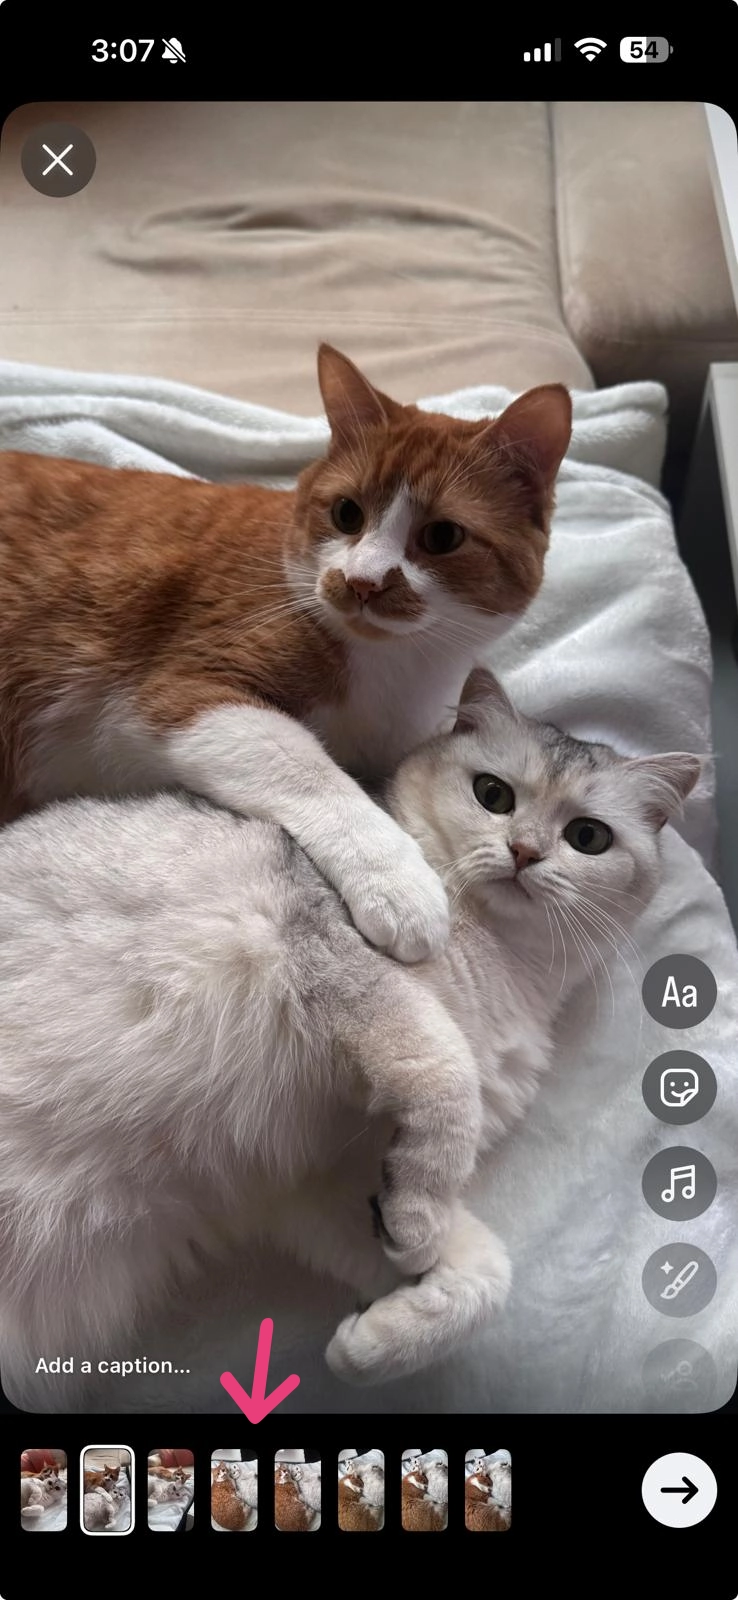
5. Tap the arrow and Share to Your Story and all slides go live at once.
his will create multiple Story slides, one for each photo you selected, rather than combining them into a single Story.
Method 4: Create a Collage in a Photo Editor
For the most control over how your photos are arranged, a third-party collage app is the way to go. You design the layout outside of Instagram, save it as a single image, and upload it to your Story like any other photo. The result is a polished, fully customized collage with more design options than anything Instagram offers natively.
Popular apps for creating Instagram Story collages:
- Canva — Drag-and-drop layouts, templates, plus custom fonts and colors (Free + Paid)
- PicsArt — Photo editing and collage tools all in one app (Free + Paid)
- Collage Maker apps — There are many collage maker apps available in the App Store and Google Play, offering simple templates and quick layouts
General steps (for most apps):
1. Open your preferred collage app and choose a vertical/portrait layout (1080 x 1920 px is the ideal Instagram Story size).
2. Select a collage template or build your own layout from scratch.
3. Add your photos to the designated panels. Adjust sizing, spacing, and any background color or design elements.
4. Export and save the finished collage to your camera roll at full resolution.
5. Open Instagram, go to your Story camera, upload the saved collage image, and share.
This method gives you the most control over your brand. You can match your fonts, colors, and layouts to your visual identity before the image ever reaches Instagram. It also gives you more flexibility and, depending on the tool you choose, more advanced customization options.
Pro tip: Choose an app with pre-built templates. This will save you time and help you avoid starting from scratch.
Frequently Asked Questions
How many photos can you add to an Instagram Story?
Using the Select Multiple method, you can upload up to 10 photos as separate slides. Using Layout, you can combine up to 6 photos into a single frame. With the photo sticker method, there's no hard limit, but the screen gets crowded quickly.
Can I rearrange photos after selecting them?
Yes. After selecting multiple photos, press and hold on any photo in the edit tray at the bottom and drag it to reorder. That said, it's easier to select them in the order you want them to appear from the start.
Do I need a third-party app to add multiple photos to my Instagram Story?
No. Instagram has native tools — Select Multiple, Layout, and photo stickers — that handle most use cases. Third-party apps like Canva are useful when you need more design control, but they're not required.
Can I edit each photo separately when using Select Multiple?
Yes. When you choose the "Separate" option after selecting your photos, each one becomes its own Story slide that you can edit independently before posting.
What's the best image size for Instagram Stories?
1080 x 1920 pixels at a 9:16 aspect ratio. This fills the full Story frame on most devices without cropping or letterboxing.

Subscribe to our newsletter
Are you ready to automate your socials?
Say goodbye to manual scheduling and hello to effortless automation.
